
Install a One Alliance Build

How to install an One Alliance Kodi build.
Step by Step guide
- Launch Kodi
- Click the Settings icon


- Choose File Manager

- Click Add source

- Click <None>

- Type the One Alliance Reborn repo address exactly

- Highlight the box under the source that you just typed in and enter a name for this media source, type one or any other name you would like to identify this source as and click OK

- Click your back button on remote or keyboard until you are back at the Kodi home screen
- Choose Add-ons menu item

- Choose the small “open box” icon at the top left side of the page under the “Add-ons heading”


- Click Install from zip file

- This may prompt you to allow unknown sources. If you have not done so Click Settings
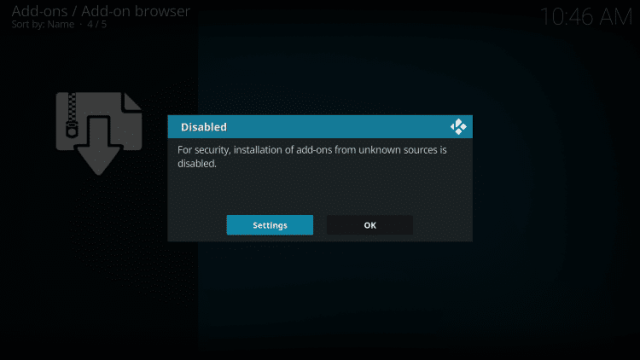
- Click toggle next to Unknown Sources to turn on

- Choose Yes

- This will take you back to zip file installation. Click Install from zip file again

- Select one or other name you assigned the media source

- Click plugin.program.onealliancerebornwizard.zip

- Wait for OneAlliance Reborn Wizard Add-on installed message to appear

- Click Continue

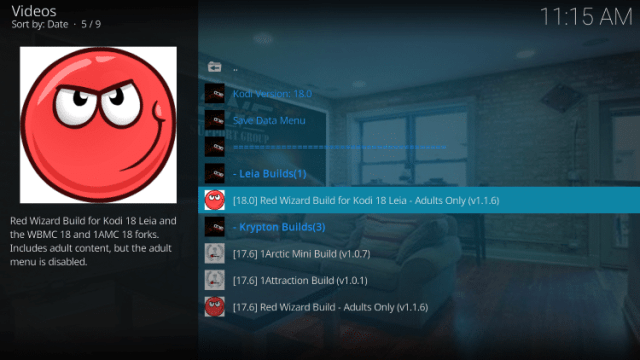
- Click Build Menu

- Select Red Wizard, 1Abode, 1ARD, 1AddonLite or 1A-MSTM Build
- Click Standard Install (always)

- Click Yes, Install

- Wait for File download to finish

- Click Force Close

- Installation is complete!
After the app has closed, you can now re-open Kodi to see your Build installed and ready for use.
Guide by Troypoint